The following information applies to the : CAL3K-AP , CAL3K-A , CAL3K-F, CAL3K-S, CAL3K-ST
Depending on the calorimeter model, there are three ports to connect a PC or laptop to. These ports are:
- USB. Distance approx. 2 meters. Ideally suitable for laptops.
- RS232 DATA D1 Port.
- RS232 DATA D2 Port.
The two RS232 ports are functional the same, just the name changes. This means you can connect a BLUETOOTH device to either RS232 port. That is to say that the supplied CAL3K software can operate on any of these ports.
In addition to the 3 possible connections, one can use BLUETOOTH modules to achieve wire-less connectivity. These modules are called RS232 bridges, the calorimeter side is RS232 and the other side is USB for the PC.
- DATA RS232 to BLUETOOTH <-> BLUETOOTH to PC
- BLUE RS232 to BLUETOOTH <-> BLUETOOTH to PC
For hardware details and options consult the manufacturer.
Software Installation:
First, download the latest Cal3k Management Tool from the following link: www.ddscalorimeters.com/software/cal3k/
Prerequisites require a pre installed :
- Windows Installer 4.5
- Microsoft .NET Framework 4.5 (x86 and x64)
Follow the simple instructions to install the software, a shortcut will be installed on the desktop when done.
Before you open the Cal3k Management Software for the first time, you need to install the USB drivers, even if you are only using the RS232 communication interface.
Open the Cal3k Management program from the shortcut on the desktop. On the top menu bar, click on “Tools” then “Communication Setup”.
The following window will open. Here the appropriate communication medium can be selected. Make sure the calorimeter is ON and that the communication cable is plugged in. Also confirm, if using RS232, the speed of the port. This can be confirmed by typing “D1 PORT SPEED”.
USB Communication : Simply select USB.
RS232 Communication : Select the appropriate baud rate, either 19200baud or 38400baud or 115200baud.

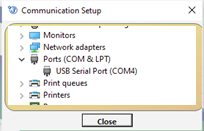
To establish the correct port, use the windows “Device Manager” tool to identify it.

If the port is not between 1 to 4, then the double click on the device, in my case “USB Serial Port (COM4)”. This will open the properties window. Click on “Port Settings” from the menu then on the “Advanced..” button. Do not worry about any of the settings on this window, they do not apply to the calorimeter communication. On the “Advanced Settings for COMx” window, there is a drop down list of port numbers. Select a port between 1 to 4. Once selected, click “OK” to save and exit the screen. Once back on the “Device Manager” screen, notice the new port number allocated to your device. Now unplug your device and reinsert it, notice that the same port number is again assigned to your device.
Now back to the Cal3k Software, now select the appropriate port. The RS232 communication acquisition of a new port is slow, so it is best to close the software and restart it.
Communication Achieved:
At the bottom the Cal3k Software screen, you will notice a gold bar moving if you have achieved communication.
Communication failure will be a dark blue bar.
The software will continuously try to re-establish communication a few times per second, so you can leave it in this state while you try to establish where the problem lies.
We suggest using the CAL3K Software for:
- Changing parameters
- Downloading and Clearing result storage
- Downloading and Clearing Event log
- Setting Time and Date
- Changing keyboard password
- Displaying live data like temperature graphs
The PC software has a ‘PASSWORD’ security built in. Once activated certain PC operations are password controlled. The PC password resides in the CAL3K. This insures that no matter which PC is connected to the CAL3K, the password security is enforced.

